My stencils are all hand done on paper. I find that working at actual size like this makes me very familiar with the image, so that when I’m tattooing it it’s like I’m doing the piece for the second time. When I’ve tried tracing digitally it feels foreign. When I can zoom in and out it’s not the same size as the tattoo; when it’s the exact same size, then you’ve made these marks before and they become muscle memory. I feel more prepared.
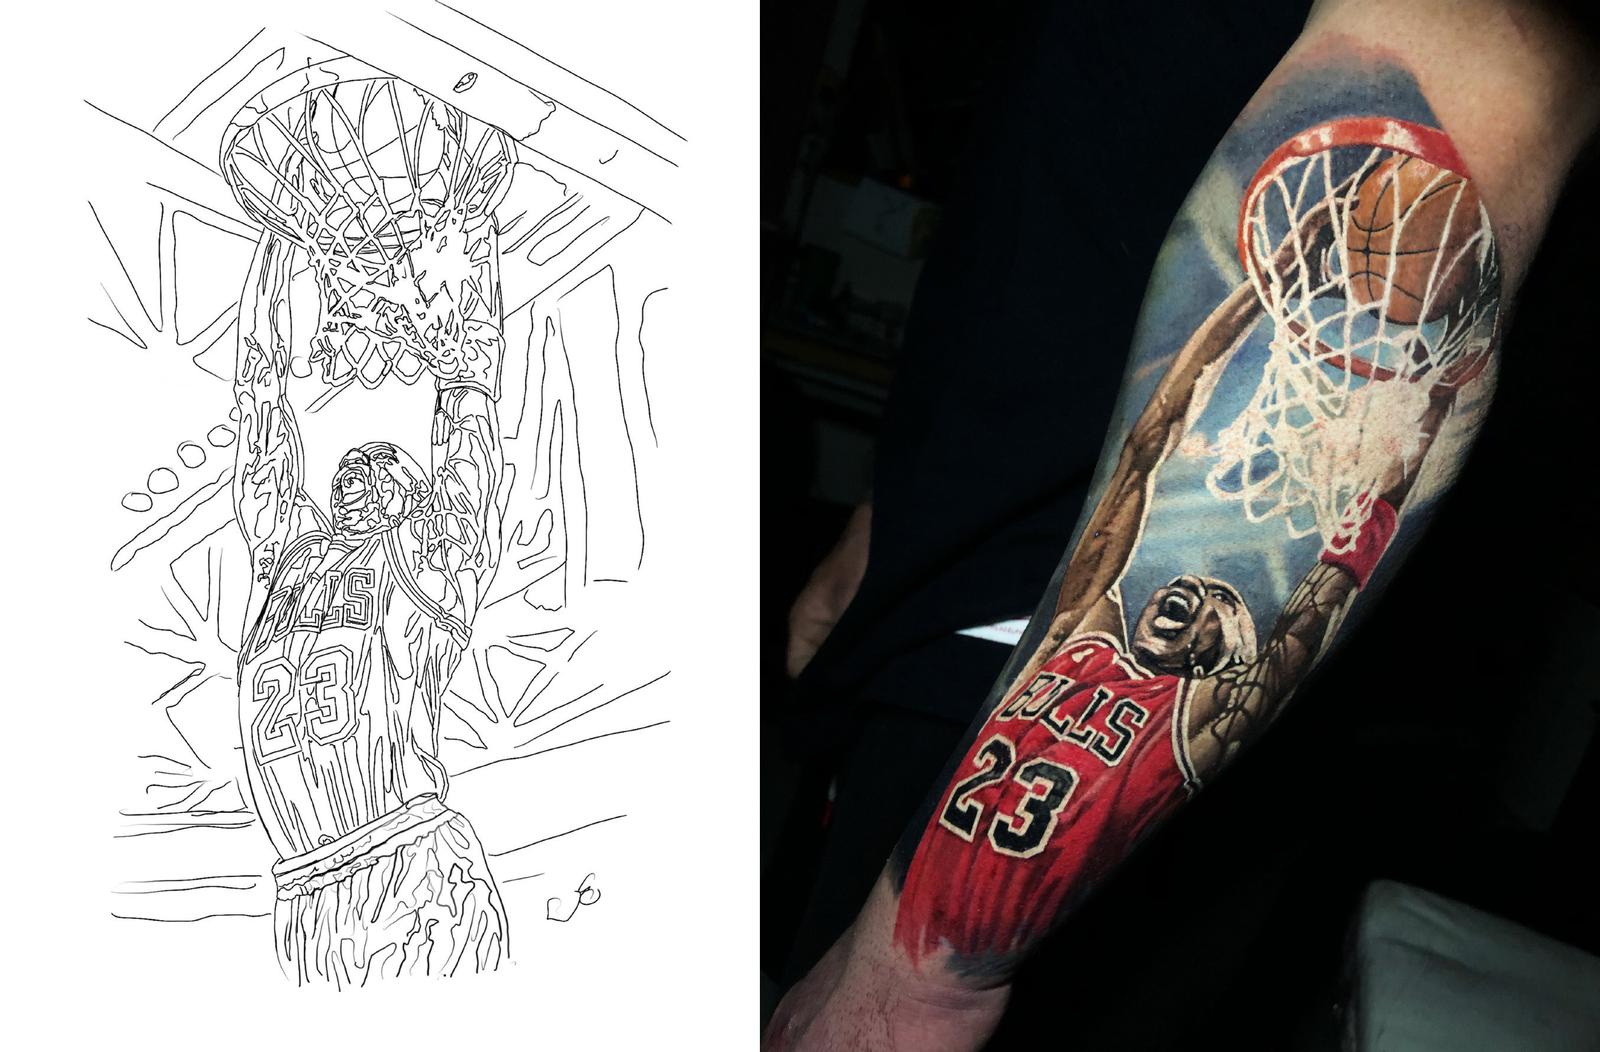 Two examples of stencils that Steve has done. Tightly focused areas have more complex stencil detail while blurry areas are much simpler.
I use Cheyenne cartridges for everything; a 15 curved mag, a 7 curved mag, a 7 round shader and a 5 liner. I’ve used those same needles for about 5 years now, and I’m so familiar with how they work it just makes things much easier. My colors I mix as I go between the caps; it makes things more fun that way because it’s so much like painting, just mixing colors as you go; I especially enjoy doing big fields of flesh tones, mapping it in with a magnum and then going back through with a round shader for blending and detail… it just feels like a more creative process than blocking in the colors in a color-by-number sense.
I work with a huge palette, maybe 30 or 35 ink caps, and I’ll often pour a number of pigments that may look similar in the caps but they all mix differently and have different bases. So it may look like I have an excess of colors but there’ll never be one that doesn’t get used. I’ll then finish small areas of the tattoo at a time, like a printer. For my reference, instead of an iPad I like to use a printed out reference that’s the same size as the tattoo. I tend to do too much detail and if I could zoom in like with a tablet, I’d be kind of fucked!
One trick that I recommend while rendering sharp vs soft effects is to try blurring your eyes occasionally and looking at the piece, and with blurred eyes you should see a good contrast between the blurry and the sharp. In addition to using focus effects, I’ll also use true whites and blacks in the foreground only, and in the background they’re always mixed down, such as muddier blacks or off-whites. This is another thing that you can really notice with blurred eyes.
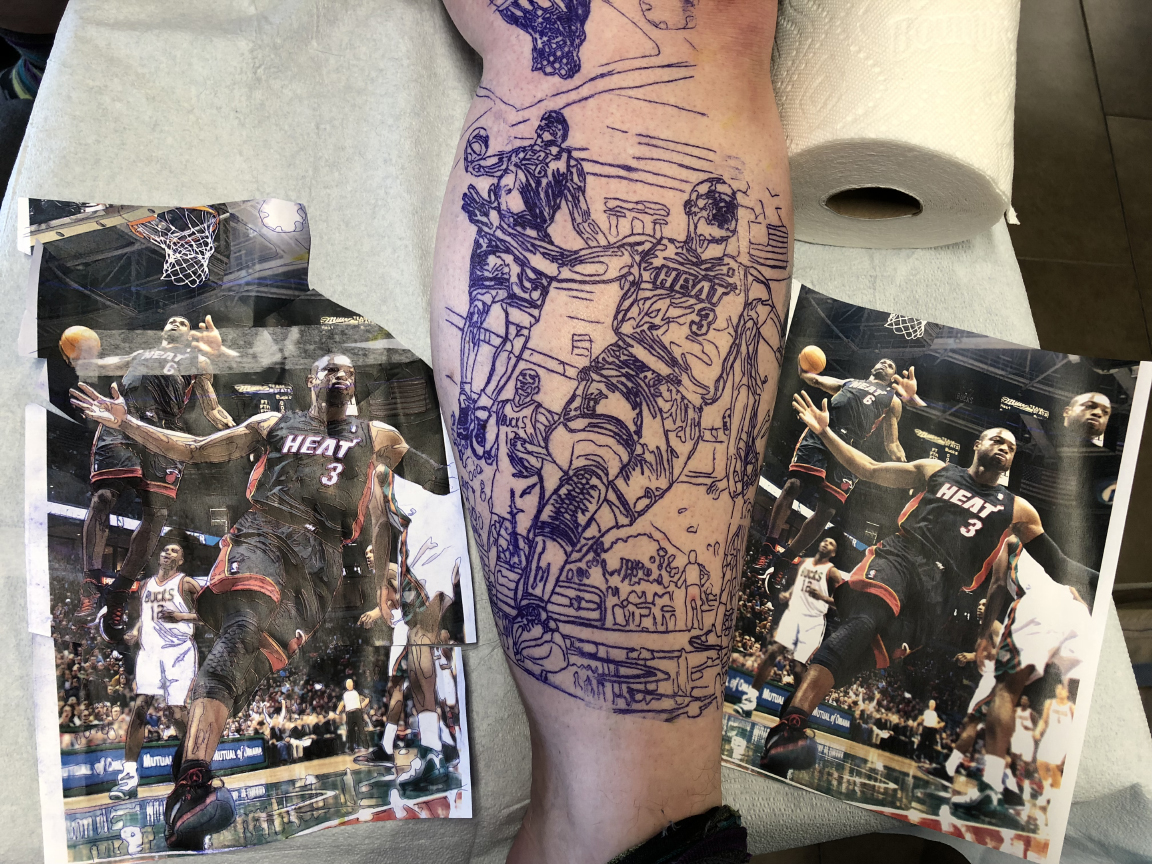 One of Steve's more standout recent pieces was the epic two-day session he did of this stunning 2010 Morry Gash photo of Dwayne Wade's pass to LeBron James during James' stint with the Miami Heat. The tattoo was called "a masterpiece" by ESPN, no doubt because Steve put to use all of his best tricks in bringing the photo to life on skin. You can see here how he's got two copies of the photo reference placed as closely as possible to the client's leg to make it easier to check the reference. One photo is untouched, and the other is the one that was used to trace the stencil, making it easier for him to find exactly where he is relative to the photo. Even though the plan was to work the piece over the course of two days, he has laid the entire stencil, insuring optimum overall placement on the leg. (Note: This is a very large leg)
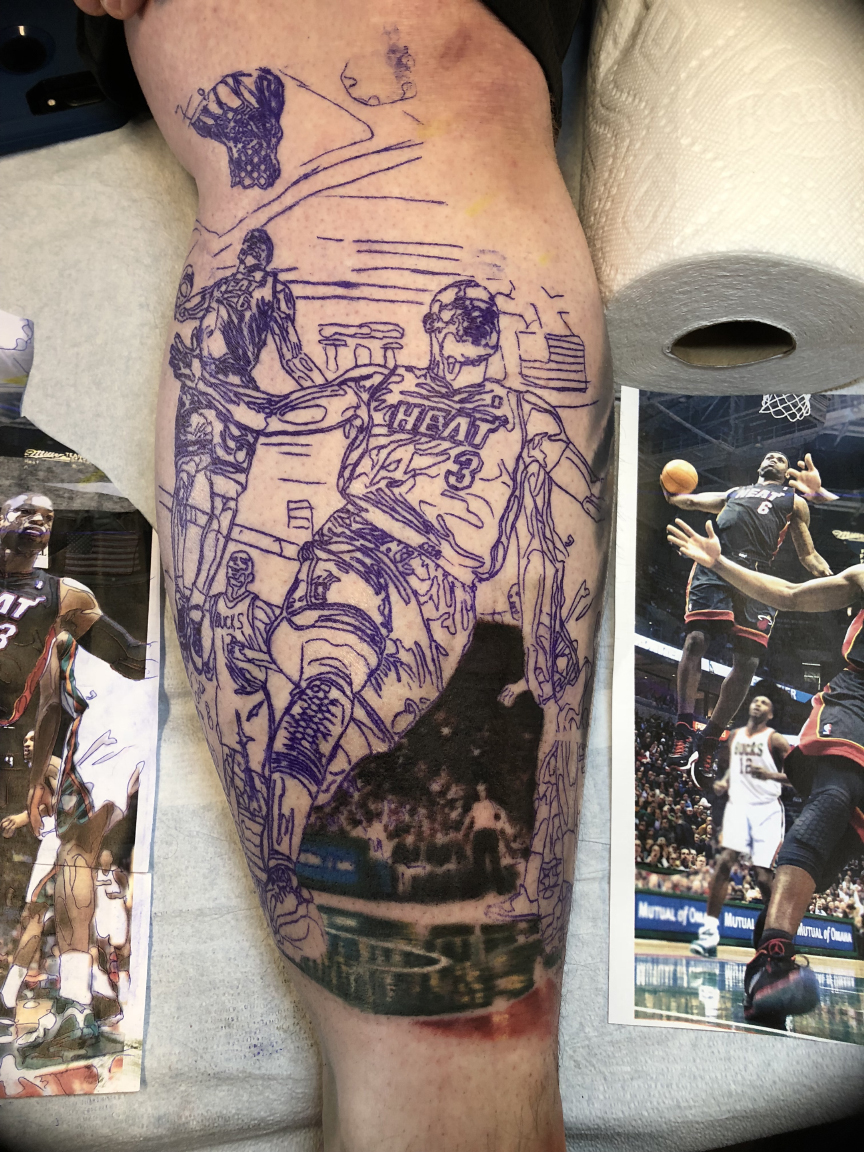
Starting at the bottom, Steve has isolated a small area of floor and distant bleachers, which he will work to completion before moving to the next area. Using magnums only, primarily a curved 15 mag, the dark tones are blocked into place with the edges of shapes deliberately kept feathered and soft. In this project, Steve is using his experience to blur the background as he goes, even though the background in the photo itself is sharply detailed. This approach ensures a strong depth of field.
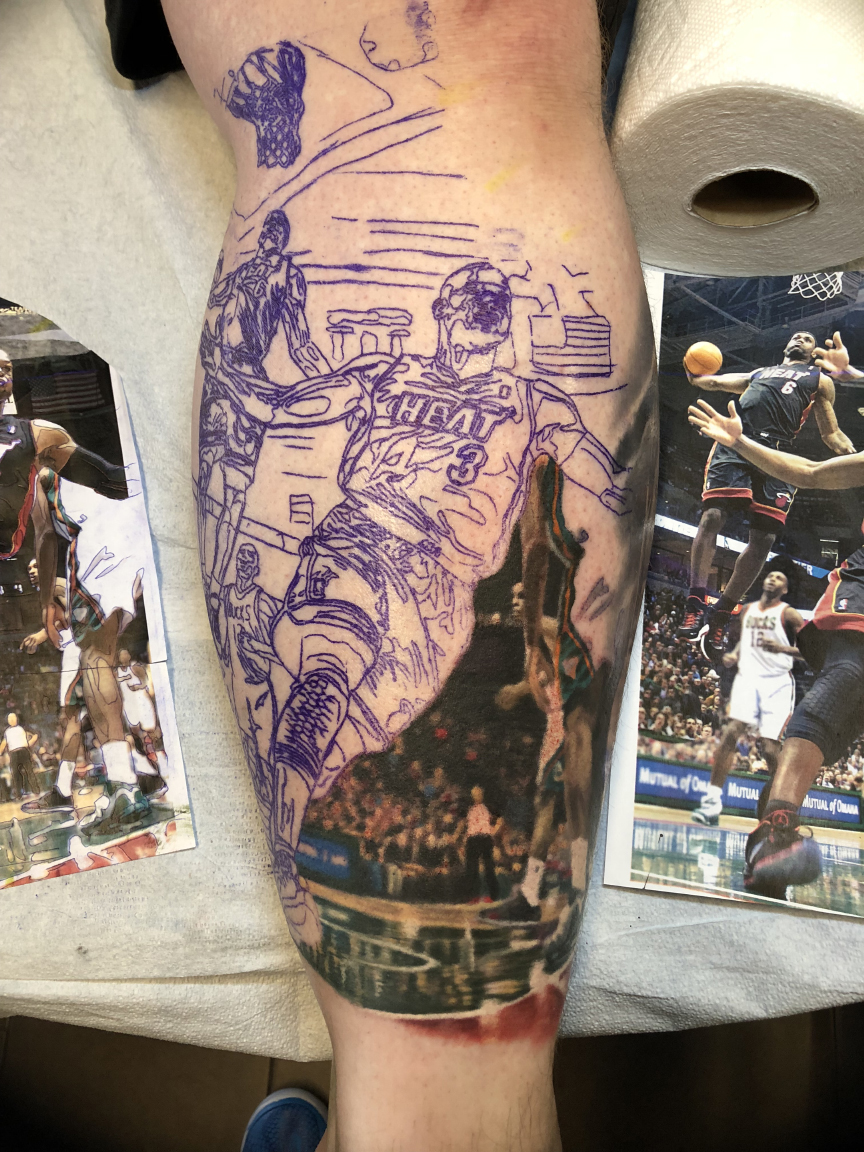
This next photo shows that same area after a saturation pass with lighter colors.A couple of background players have been completed as well; these figures are handled with greater focus than the deep background, with their edges being a bit sharper than the fans in the bleachers, but still without the full level of development that the two main players will get. With such a complex and layered image, this focal distinction can be very helpful- for example, note how the background player's arm hangs below Dwayne Wade's armpit. Without the clear focal difference it might look like Wade has an extra arm- but because of the softer approach, this isn't an issue.
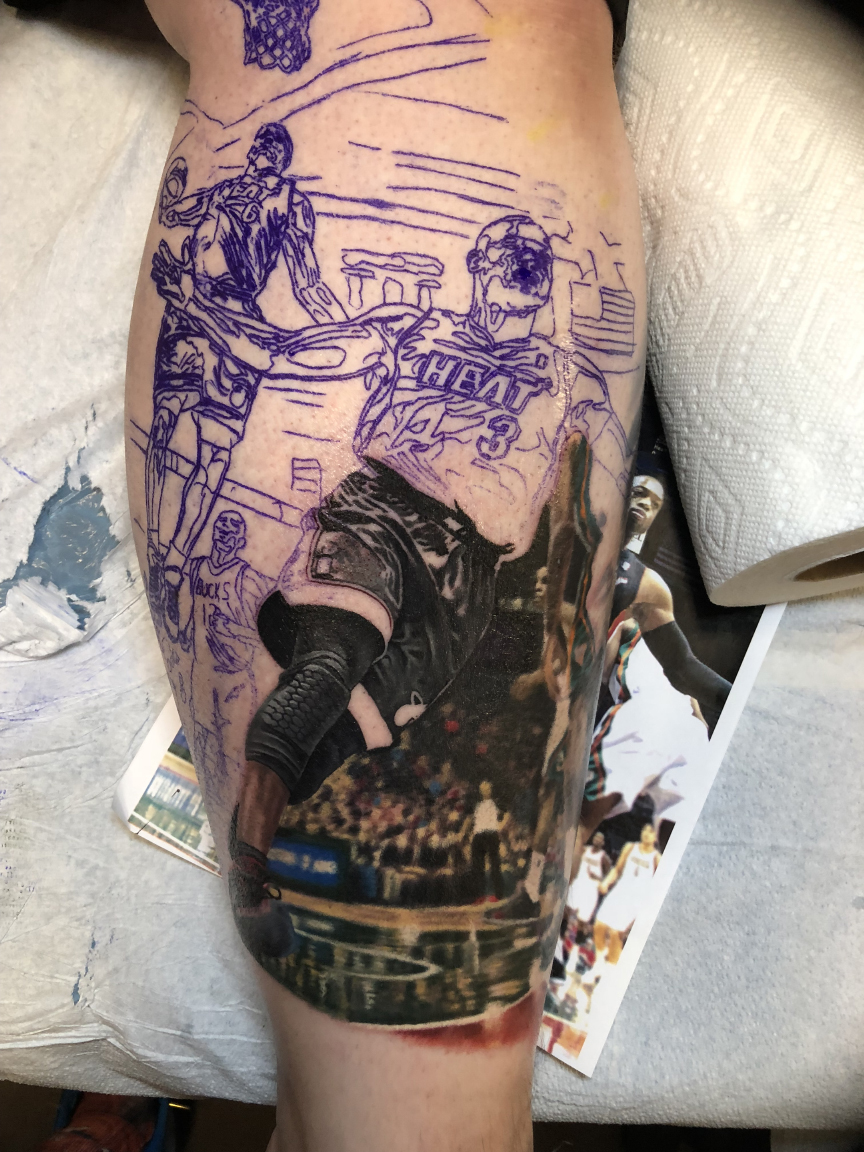
Next comes the lower half of Dwayne Wade, who is getting the full tight focus treatment. Here you can see that area halfway done, with the dark tones in the fabric wrinkles carefully blocked into place. Edges of these foreground shapes are given the sharpest possible treatment, which is crucial in separating them from the background.
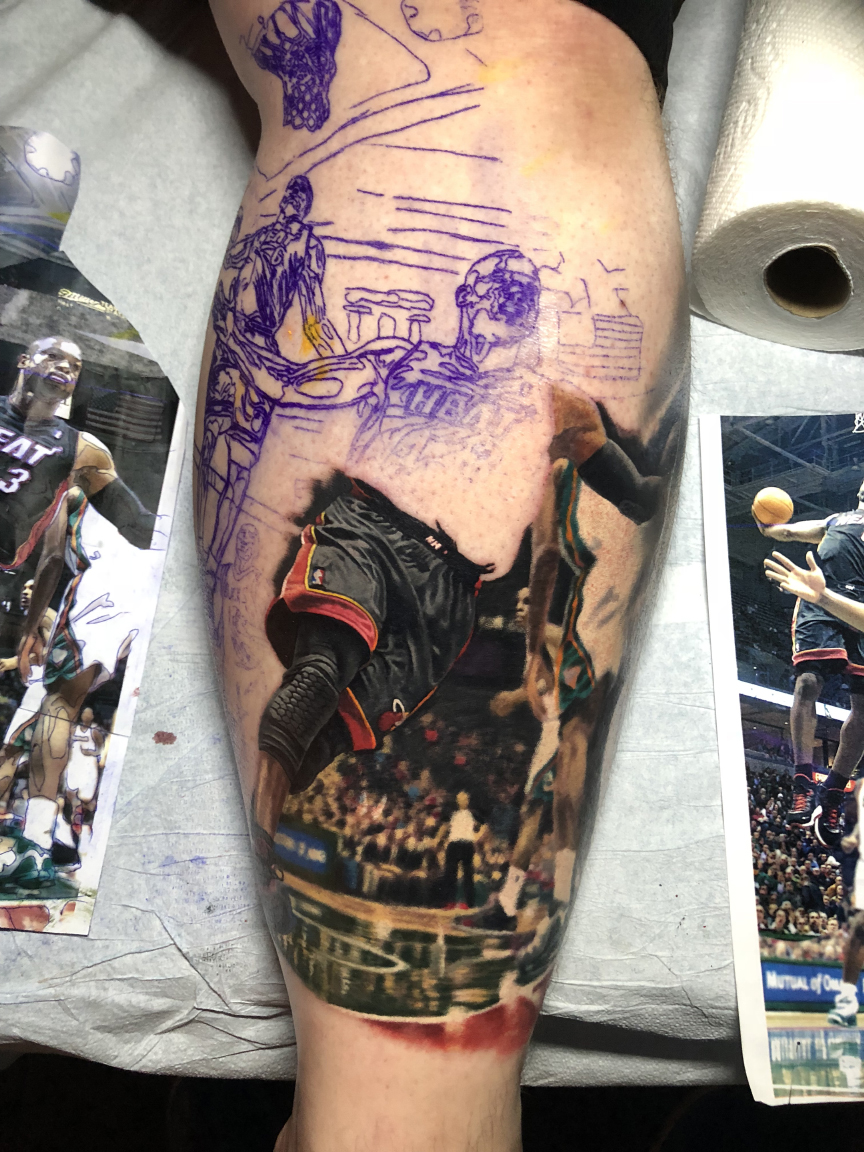 The fabric in the shorts is then given the full saturation treatment, using a variety of opaque grays and subtle colors to give the fabric that dark shine. The kneepads are also rendered sharply, which will help pop them out from the background. This marks the end of Day 1, with roughly half the tattoo completed. The remainder of the stencil will be removed and re-applied on the following day.